In the previous articles about connecting SharePoint 2016/2019 and ADFS Server (part 1, part 2 and part 3) we mostly discussed the procedure for configuring the servers in order to successfully authenticate with them. In this article, I would like to highlight 2 problems that can arise when turning on the trusted identity provider authentication. They are:
- People picker.
- Search.
People Picker
In this case, the people picker is problematic because SharePoint cannot verify people with the help of ADFS and further with Active Directory. SharePoint uses claims rules to try and figure out what kind of object is trying to access it. In the screenshot you can clearly see that the people picker successfully recognizes an object, whatever we enter into the people field.
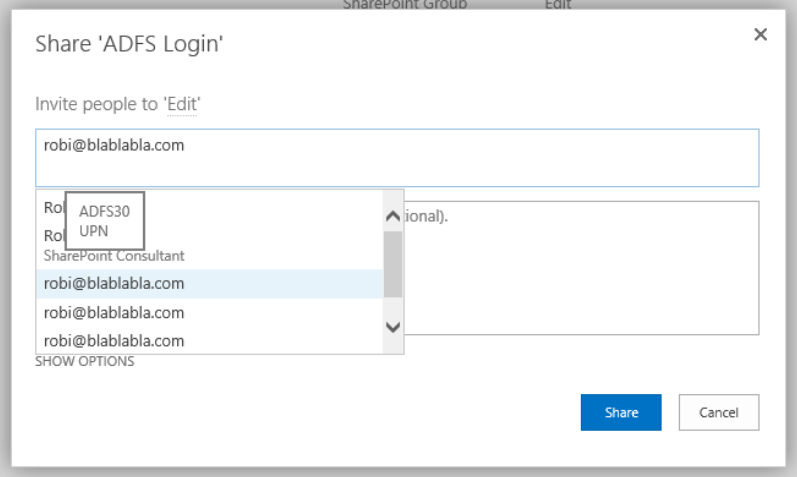
In the people picker, we can see thath SharePoint recognized 3 different entries:
- UPN.
- Role.
- Email.
The number of entries we se here depends on the configuration of the TrustedTokenIssuer.
$ap = New-SPTrustedIdentityTokenIssuer -Name "ADFS30" `
                    -Description "ADFS 3.0 Federated Server" `
                    -Realm $defaultRealm `
                    -ImportTrustCertificate $signingCert `
                    -ClaimsMappings $roleClaim, $EmailClaim, $upnClaimMap `
                    -SignInUrl $signinurl `
                    -IdentifierClaim $upnClaimMap.InputClaimType
In the claims mappings we can see that SharePoint gets data about »role claim«, »UPN claim« and »Email claim«. If we select one of the entries in the picker, SharePoint treats it as a completely legit entry, even though such an entry/object does not exist.

Solution
Luckily, solving this problem is simple. We install an extra solution to the server. Codeplex’s website contains a lot of community solutions, including »LDAP/AD Claims Provider for SharePoint« (https://ldapcp.codeplex.com/). Installing this add-on to our server enables our TrustedIdentityTokenIssuer to recognize users from our Active Directory, even though authentication is still performed through ADFS.
After installing the WSP packet to the SharePoint Server, it is important to successfully register the claims provider with our TrustedIdentityTokenIssuer. Of course, we must do it in PowerShell.
$tp = Get-SPTrustedIdentityTokenIssuer –Identity "ADFS30"
$tp.ClaimProviderName="LDAPCP"
$tp.Update()
After configuring the TrustedTokenIssuer, entries in the people picker become different.
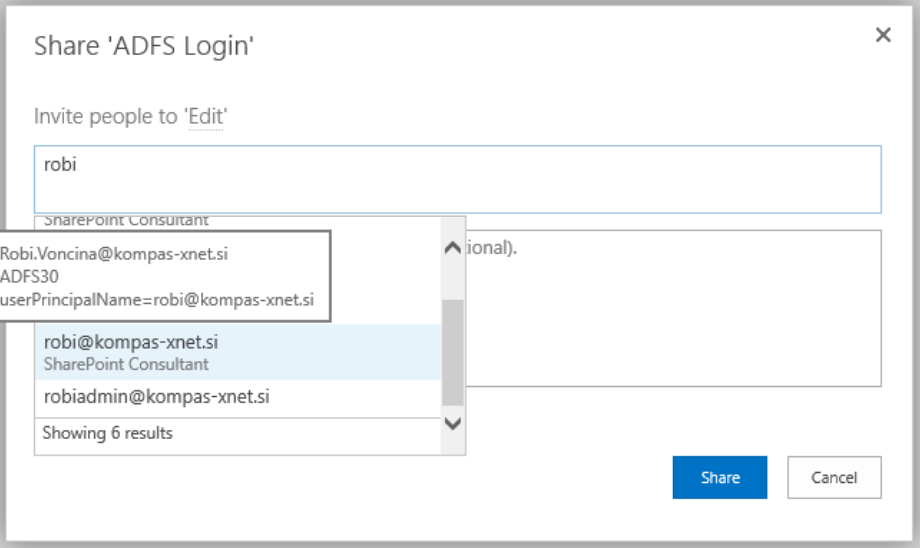
In this case we see that when we enter »Robi«, only entries that are successfully resolved in Active Directory are displayed. This add-in therefore solves the problem of displaying entries that are not part of Active Directory.
Search
In any type of SharePoint configuration, that does not use Windows authentication as the default zone, or that use multiple authentication methods, indexing can be problematic. Search doesn’t know how to properly authenticate to our SharePoint webpage. In this case we need to use some extra web application settings, namely, we need to “Extend”.
When we “extend” a web application, it is very important that “default” always stays with Windows authentication, while other instances can use other methods. This is because of the way that search works. If we don’t do this and index content, that is not on default AAM, problems can arise when using search.
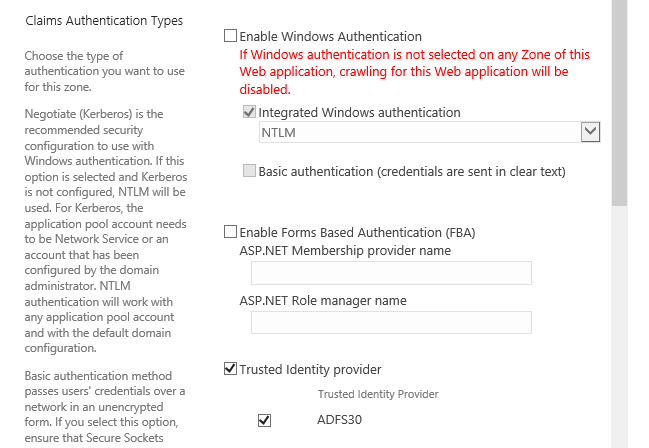
In our case, I created a new instance of the web application, switched Windows authentication off and configured only “Trusted Identity Provider”.
When “Extending”, a new website is created in IIS, which points to the same content database. After that, we still need to change the “default” zone, which currently allows two methods of authentication. We are going to turn off “Trusted Identity Provider” and leave only “Windows
Authentication” turned on.
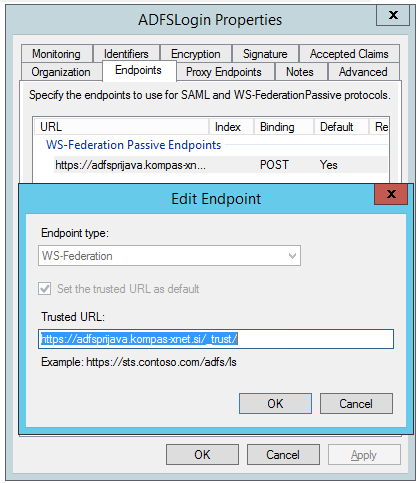
But let’s not forget about the ADFS Server configuration. The “Relying Party Trust” configuration contains the URL that the ADFS Server redirects us to after a successful authentication.
If the configuration was successful, we now have a fully functional SharePoint site, which uses SAML authentication. From here on out, you have a lot of options. You can use two-factor authentication or MFA.
This concludes this series of articles about connecting SharePoint and ADFS Server. There are of course certain scenarios we haven’t covered, but you can always contact me via e-mail.