In the previous article I wrote an introduction about how to start using templates for custom sites in SharePoint Online. I wrote that to prepare a template, we need to prepare a JSON schema and import it to SharePoint Online, after which we can select the template from the drop-down menu when creating new site collections.
In this article, I will continue with describing the tools that can help us prepare the JSON schema. I will also describe the first steps for constructing more complex templates by using Microsoft Azure.
Tools for preparing the JSON schema
Existing site
Because it is usually much easier to prepare a reference site by clicking through the options that to write the JSON schema, Microsoft has prepared a handy tool/cmdlet in the SharePoint Online PowerShell module, which we can use to create the JSON schema based on an existing site.
The first thing we need to do is prepare the reference site, with all the lists, libraries and other necessary elements. After that, we need to use some SharePoint Online PowerShell scripting.
Below in an example for a site collection in my subscription:
Get-SPOSiteScriptFromWeb -WebUrl "https://r0b3r70.sharepoint.com/sites/Pika-WebTemplate" `
-IncludeBranding -IncludeTheme -IncludeRegionalSettings -includedLists ("Lists/Potni nalogi","Pomembni dokumenti") `
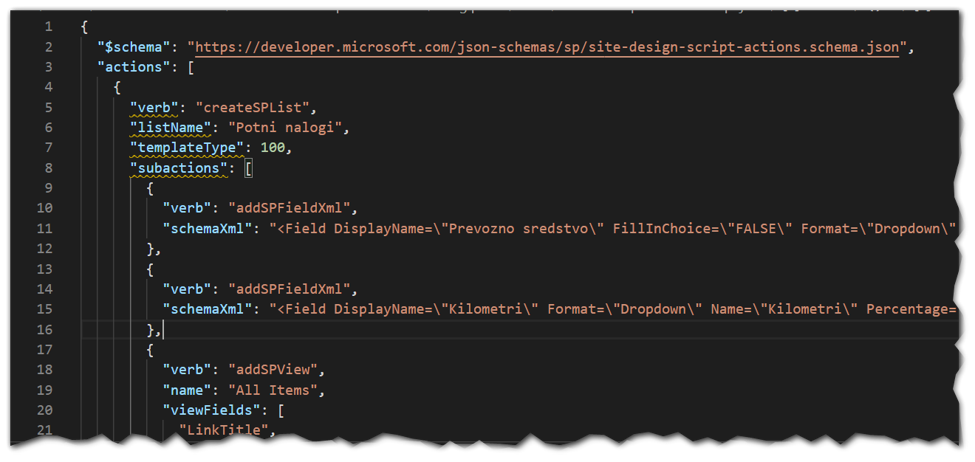
| out-file "C:\Temp\SPO\Xblogs-exported-site-script.json"An example of an exported schema with included lists:
We can then use the exported schema to create new sites, as was described in the first part of this article series.
SiteDesigner.io
SiteDesigner.io is a website that we can use to create the schema to prepare a site template.

With this tool the preparation is really simple. There is no need to bother with syntax, all we need is to define the elements we want to include and the schema is auto-magically prepared for you in real time.
An example of a template made with SiteDesigner.io:

The drawback of SiteDesigner.io is that it doesn’t allow us to add advanced action into site scripts, such as adding an action that triggers either Power Automate (ex Microsoft Flow) or an action in Logic Apps in Microsoft Azure.
Advanced Actions for Designing Web Sites
One of the big drawbacks of using site scripts is that we can’t use the JSON schema to define for example which web parts are on which page, we can’t define sections on pages and how sections are formatted, so we can’t make use of other Microsoft Azure or Office 365 tools during the creation process.
In the past, the recommendation was to use Microsoft Power Automate for these types of actions, but with the changes in the licensing policy in February 2019, when the “When an HTTP request is received” became a part of the P1 or Premium license, this has changed and now it is recommended to use Microsoft Azure and Logic Apps
Using Logic Apps
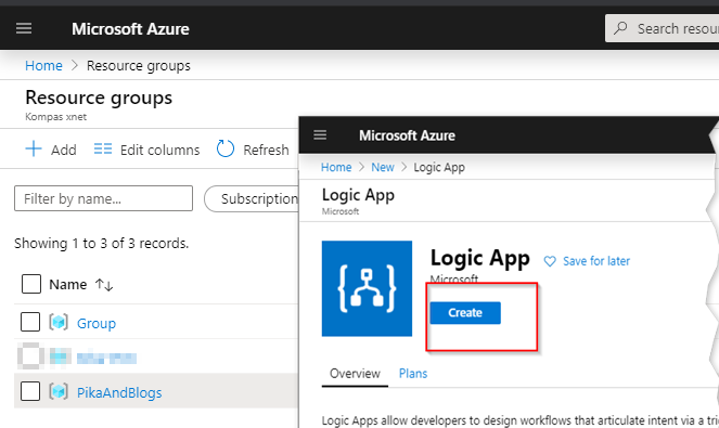
When using MS Azure, all the services depend on the subscriptions you have. To use Azure Logic Apps, we must first create a new Resource Group.
When the resource group is created, we can then create a new Logic App instance.
When creating a new Logic App, we must first specify a few extra parameters:
- Name: The name you choose for the Logic App.
- Subscription: Because the usage incurs costs, you must define the subscription that this app will use.
- Resource Group: You can create a new or create an existing one, in which you already specified resources that you use for Azure functionalities.
- Location: Location of the datacenter, in which the app will run.
When the application is created, we need to select the trigger for running the application.

Because we will be calling logic, that is running on SharePoint Online, during the process of creating a SharePoint site, we need to select “When an HTTP request is received” as the trigger.
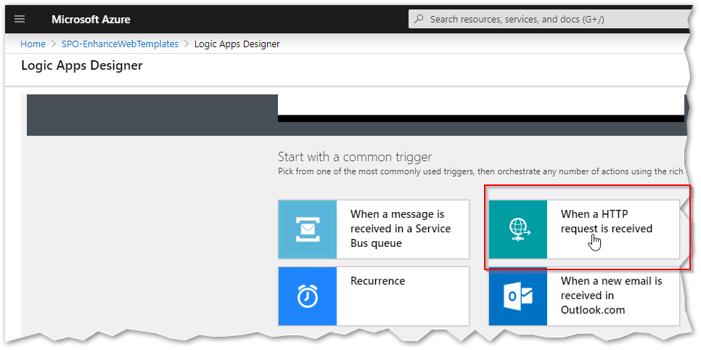
When we select the trigger, the “Logic App Designer” opens, which at first contains only one action, as can be seen in the picture:
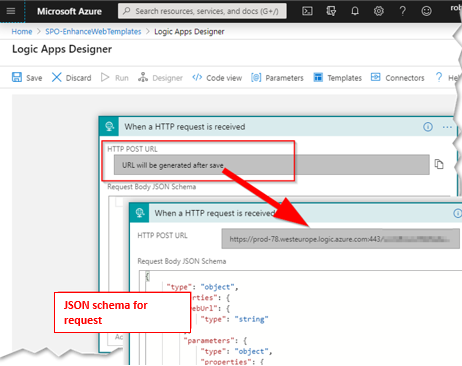
There are 2 very important pieces of information in this step:
- HTTP POST URL – which we will need in SharePoint “Site Scripts” and is shown when we save the logic app for the first time.
- JSON request schema – is the schema in which the request to Azure will be sent and must be defined like this:
{
     "type": "object",
     "properties": {
         "webUrl": {
             "type": "string"
         },
         "parameters": {
             "type": "object",
             "properties": {
                 "event": {
                     "type": "string"
                 },
                 "product": {
                     "type": "string"
                 }
             }
         }
     }
 }
Of course, we also need to change the configuration on the MS Azure side, so we can change the actions that need to happen when a request comes from the SPO side on MS Azure.
To conclude, here is the JSON schema that we need to add into the site script that we prepared with a tool, by hand, or by exporting an existing SharePoint Site. The action to start Power Automate or Logic Apps can be added anywhere inside the siteScript.json file.
{
      "verb": "triggerFlow",
      "url": "[paste the workflow trigger URL here]",
      "name": "Apply Template",
      "parameters": {
          "event":"",
          "product":""
      }
    }
In this article we showed a few examples of preparing advanced functionalities, that require integration with other Microsoft products. In the next article, I will continue with describing the configuration that is needed on the Microsoft Azure side, so that we can successfully integrate SharePoint Online with Logic Apps and create app only access for the logic app on the SharePoint Online side and of course test the creation of the new site.