In the previous article of this series, we described how to use different tools to prepare a schema to process a SharePoint Online page and adding custom objects. We also began preparing a Logic Apps application, which will be responsible for running a PowerShell script, that will change the configuration of a certain SharePoint site or site collection.
Azure Logic Apps
Many of you will probably be asking why should we use Azure Logic Apps when we have Microsoft Flow, which is a part of the Office 365 package and which is also mentioned in the documentation in the link below:
https://docs.microsoft.com/en-us/sharepoint/dev/declarative-customization/site-design-overview
The reason is the change in the licensing model that happened in the beginning of last year. The action we need to run PowerShell scripts is in the Microsoft Flow Premium package.
You can read more about this here:
If we come back to the configuration of our Logic App, we need to configure the logic – what happens when a request comes to the workflow. So I will add an action called Azure Queues to the workflow. This action allows me to run a PowerShell Script because as we will see later, an object in Azure Queue can be a trigger for running a script.
Storage Account
Description
Azure Storage Account is a resource in Azure, which allows us to save many different types of data – from blobs, files, queues, tables to disks. The advantage of storage accounts is that Azure gives us access to all the data through the HTTP or HTTPS protocol.
Settings
Before we set up an action for Azure Queue, we need to create a new resource in Azure, called Storage Account. Similar to other resources, we create in Azure, it is also necessary to specify a location and subscription we will use to run operations. When the storage account is created, we need to make some adjustments on the resource. The first thing we need to do is create a new queue in queues.
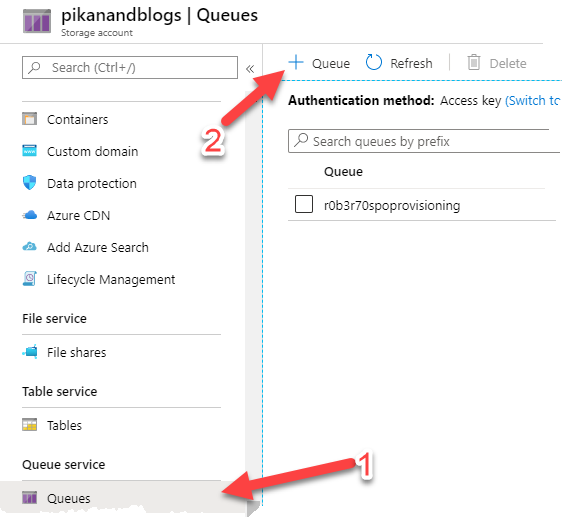
The second thing we need are Access Keys, which we can use to access our queues and where we can drop off messages to start scripts.

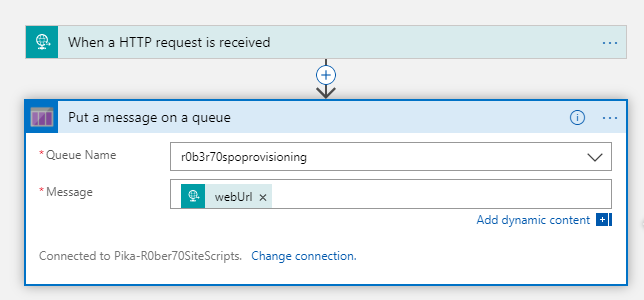
When the storage account is ready, we can continue with preparing our workflow. In the Logic App, we add the action “Put a message in queue”, select the name we prepared in the storage account and finally specify what data should be sent as the “Message”.
With that, the workflow is finished. The next step is to prepare the PowerShell script that will run at the Logic App call.
Azure Functions
Description
The “Function App” is a functionality of Microsoft Azure, which enables you to run small code snippets without the need to set up your own infrastructure to run them. There are different options to run the code, such as at certain events, based on a schedule or upon receiving and HTTP request. Another advantage of Function App is that it allows us to connect to an almost unlimited number of other data sources or services.
Settings
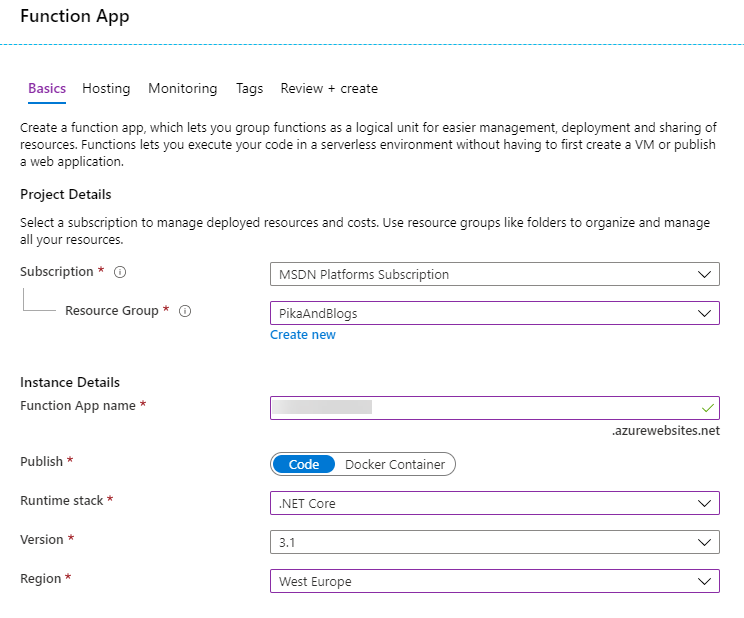
Similar to the previous step, we first need to create a new resource in Microsoft Azure. In the resources we look for “Function App”, fill out a couple of fields and click Create.
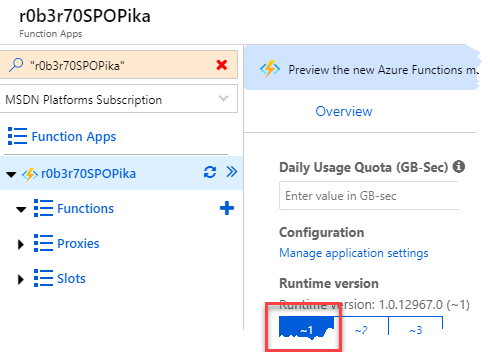
When the resource is created, we will notice some peculiarities in the Function App settings. The first thing is that if we want to use PowerShell, we need to set the Runtime version of the Azure function to 1.
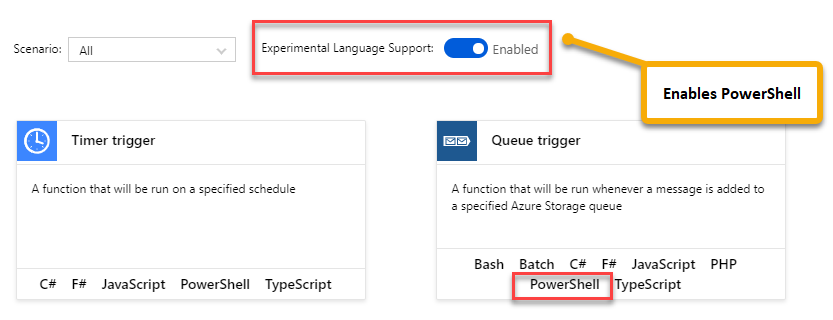
The second thing is that by default, the Azure function doesn’t allow the use of PowerShell, so we need to enable “Experimental Language Support”.
When setting up a new function, we need to be careful to enter the name of the queue we created earlier in our storage account into the “Queue name” field. In my case, this it is called »r0b3r70spoprovisioning«.
PowerShell Module
To use PowerShell, or to put it in better words, use the PnP PowerShell module for Office 365, we need to load this module into our Azure function. If the PnP PowerShell module is already installed on your computer, you can run the following command:
Save-Module "SharePointPnPPowerShellOnline" -Path "C:\temp\SharePointPnPPowerShellOnline"With this command, you save all the necessary file for this module into the selected folder. In the next step, we need to copy all of these files to the appropriate location in Azure.
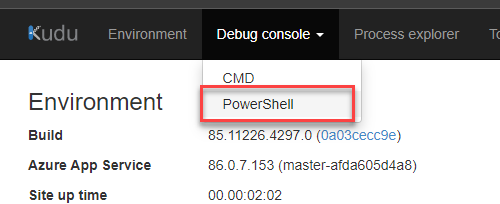
At the settings page of the function, we select “Platform features” and open “Advanced tools (Kudu)”.

In the next step, we need to select CMD or PowerShell.
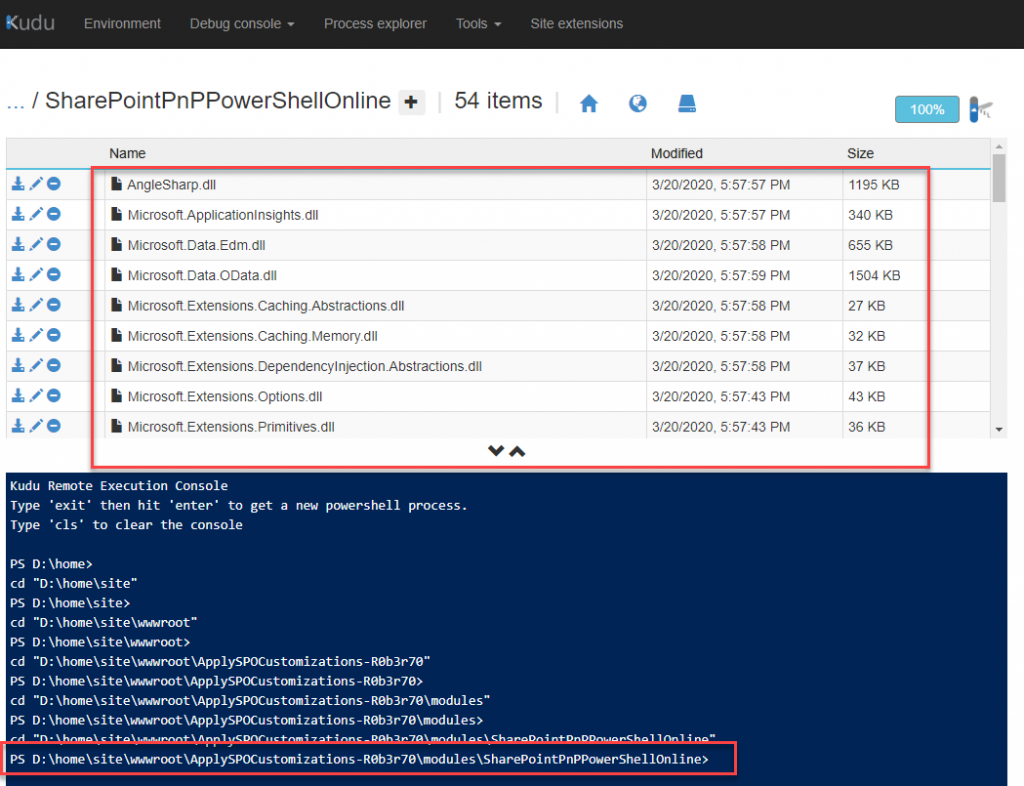
When the console opens, it is very important that we select the correct folder in which to upload the files. The correct path is always “Site” – “wwwroot” – [function name].
In the function name we need to create a new folder called “modules” and in this folder, create another folder with the name of the PowerShell module. In our example, this is “SharePointPnPPowerShellOnline”. We then need to open the folder and copy all the files we got by using the “Save-module” command into it. The end result should look something like the screenshot below.
In the last step we did everything that is necessary to start typing up the script that will modify our SharePoint sites. In the next article I will describe how to prepare the script and also how we can safely authenticate to SharePoint Online from our function, that will be called by Logic App. Hopefully by then, the situation with Covid-19 will already be resolved.